In this guide, EZStation is already installed on the user’s computer, and the recording device has already been added to the software’s device list.
Step 1 - Accessing Playback & Exporting
From the Control Panel, select the Playback Tab to access the playback section of EZStation.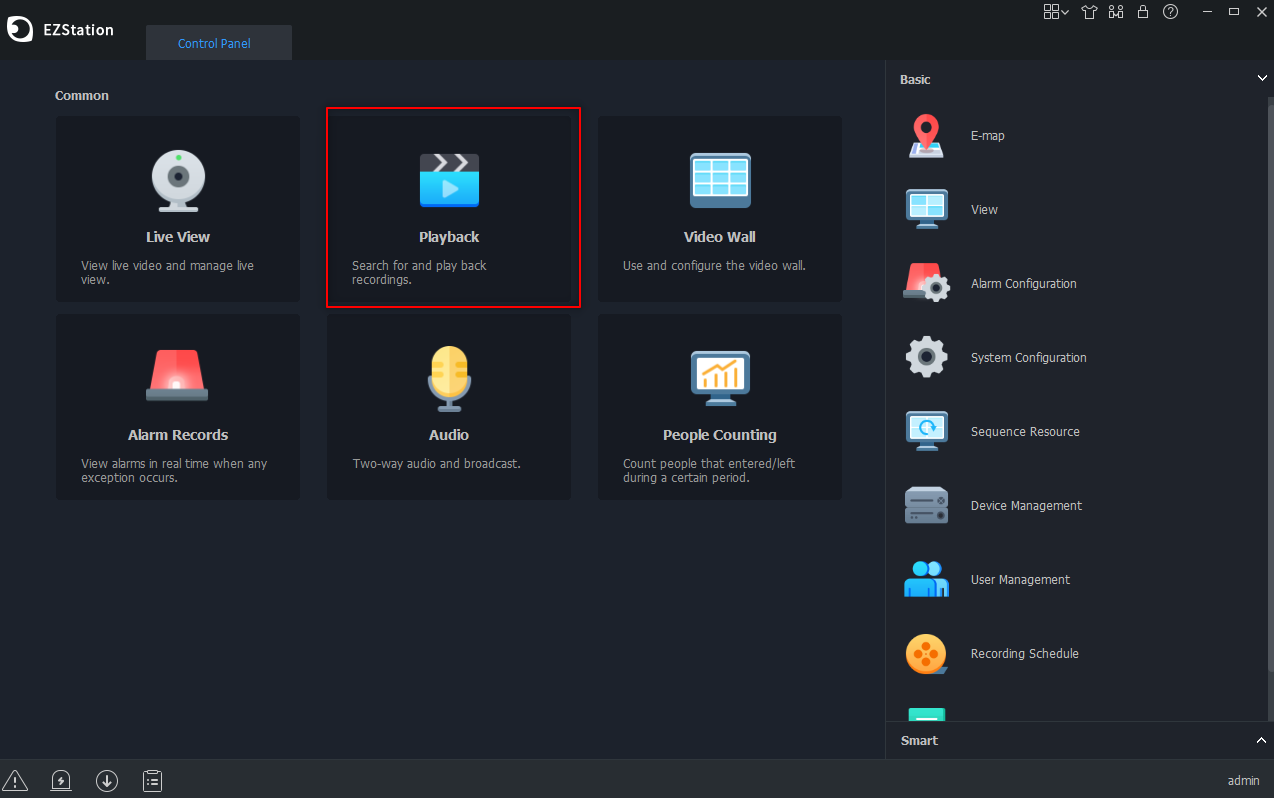
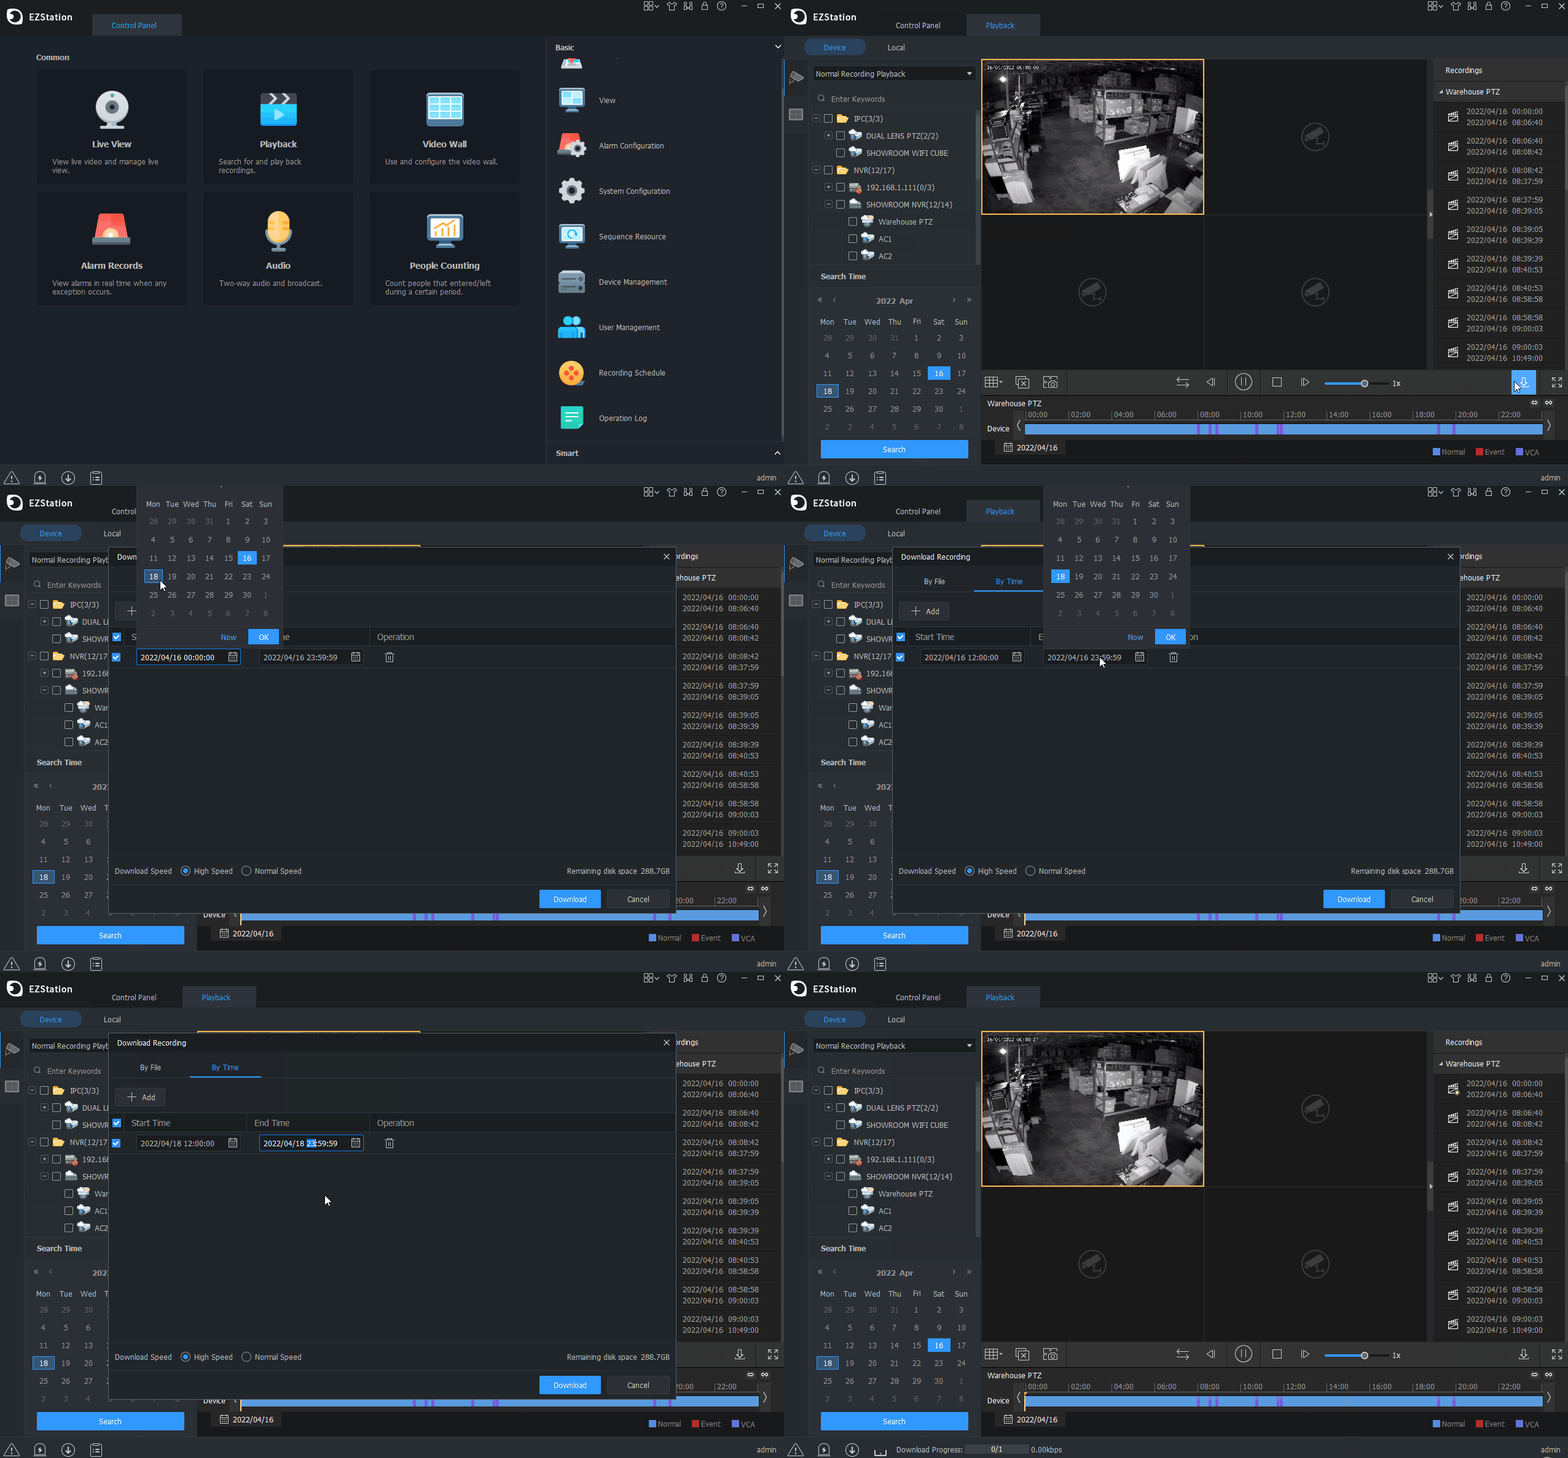
From the Playback Section, On the left-hand side, click on the “+” next to the NVR/DVR, the camera will drop down. Then select one camera on the left-hand side to playback and save footage from. Once the camera is selected, the calendar should populate with Blue or Red dots to indicate what type of footage was recorded on that day.
- Blue = Normal
- Red = Event
- Purple = VCA
After the day has been selected, Click the Search icon under the Calendar.
Next, select the download icon " ". Then select the "By Time" tab and input the timeframe that you want to export footage from. When this has been done, select the Download icon.
Step 2 - Finding Saved File
To find where the saved exported footage went, you can select the Download Progress at the bottom of EZStation.
After the Download Icon has been clicked, a popup window will appear. From that popup window, there is a folder icon that can be selected to open the file path on your computer.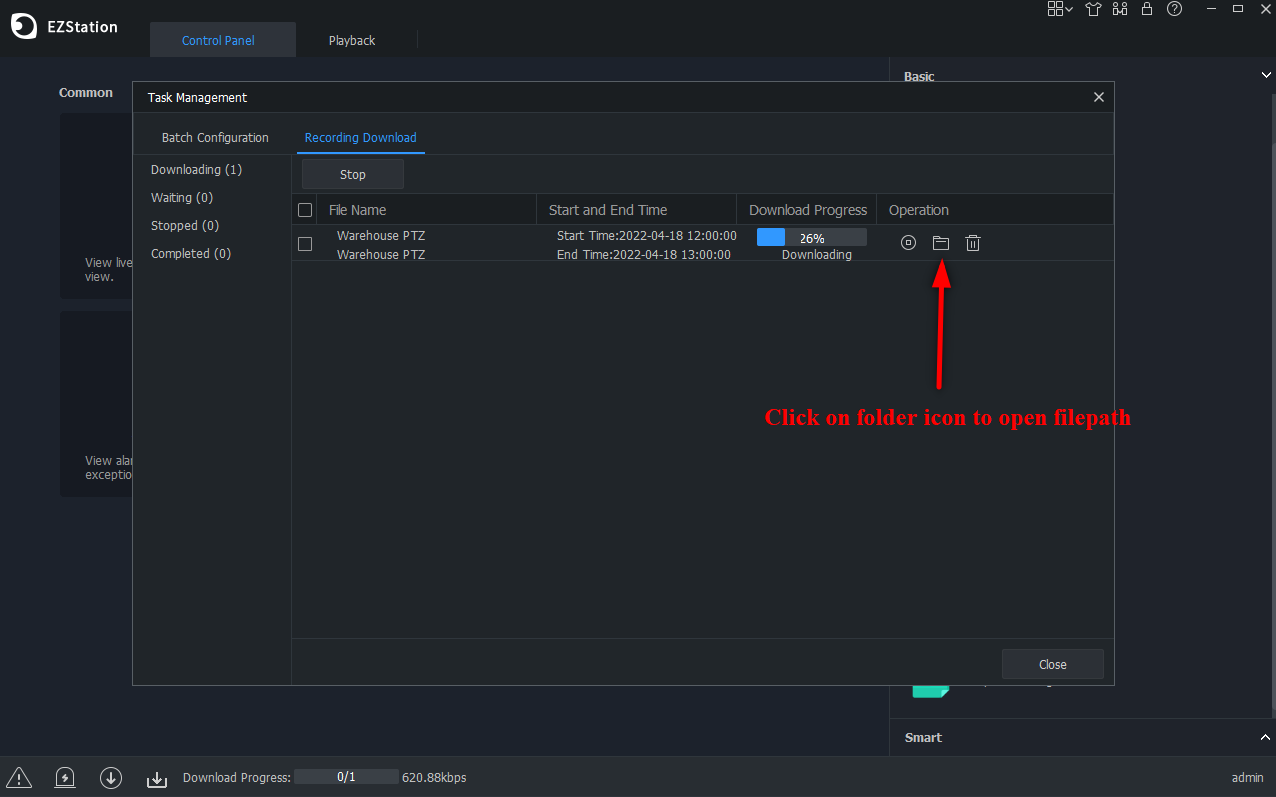
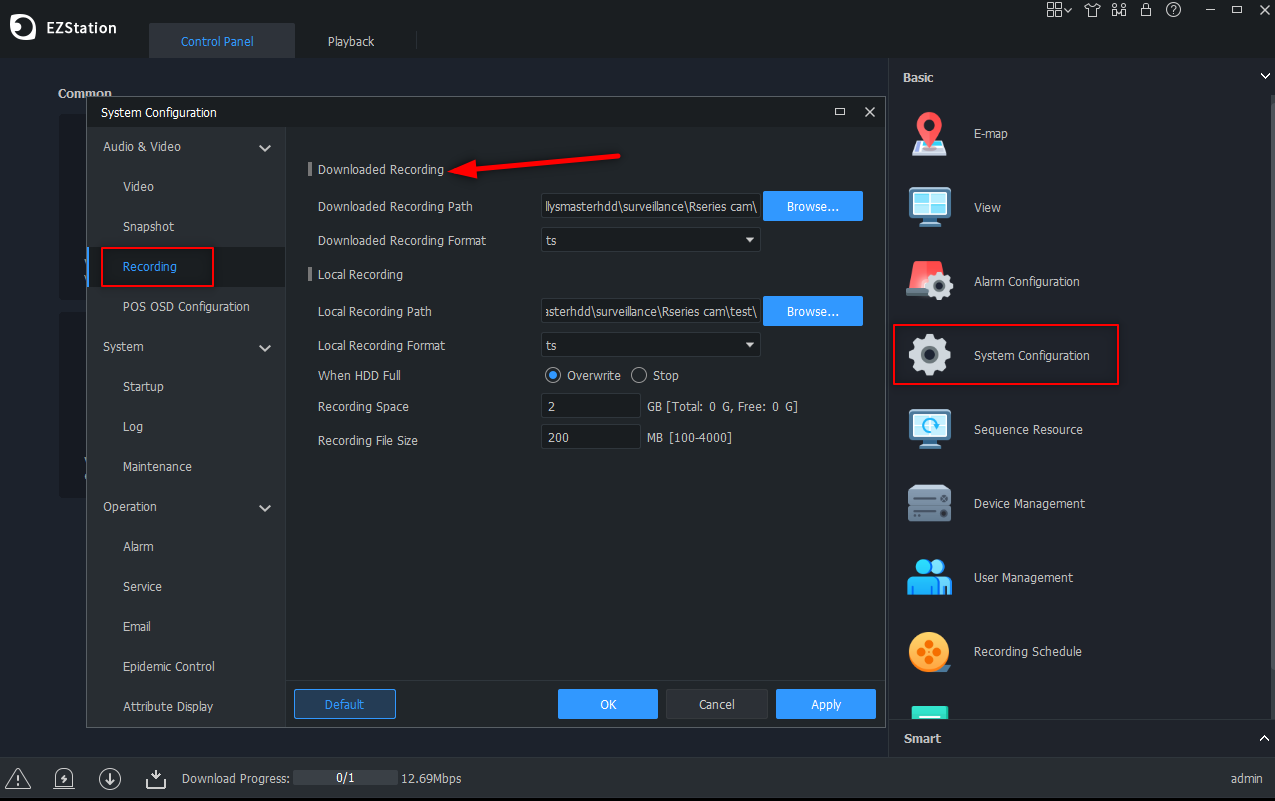
To change the File Path, from the Control Panel in EZStation, select the System Configuration icon, then Recording Tab.